Magento
Magento 1.9 End of lifeFrom June 2020 Magento 1.9 will be end of life and we will no longer update our Magento 1.9 plugin. The plugin remains open source and available for customers that haven't migrated to a new platform yet.
This integration displays allows you to import all existing Magento customers into Belco and loads relevant customer information from Magento on the customer detail page.
Api accessBefore you begin please check if the REST API is accessible. The easiest way to that is to open an API endpoint in your browser, eg. https://yourdomain.com/api/rest/customers.
The page should return XML with an Access denied message.If you get a regular 404 page, make sure the rewrite rules for the REST API are enabled.
If you are using a firewall please whitelist the following ip ranges
185.60.151.0/26
5.104.96.0/21
46.231.144.0/21
109.232.232.0/21
185.21.192.0/22
171.33.64.0/18
148.253.64.0/18
1. Install the Magento extension
To enable this integration you first need to install our Magento Extension, if you've already installed the extension you can continue to step 2.
2. Create a new Consumer
First, you need to create a Consumer in the Admin Panel. Creating a new consumer means registering the application. To do this, perform the following steps:
- On the Magento Admin Panel menu, select System > Web Services > REST - OAuth Consumers.
- On the OAuth Consumers page, click Add New in the top right corner to add a new consumer.
- The New Consumer page opens. The Key and Secret fields are filled automatically and cannot be edited. These values are generated automatically and will be used to identify the Consumer in Magento.

- Fill in a name for the consumer, eg Belco
- Copy & paste the Key and Secret, as we'll need it in the next step.
Click Save in the top right corner to save the created Consumer.
3. Configure REST user roles
Then the appropriate roles have to be configured, in order to give Belco access to the REST api.
- On the Magento Admin Panel menu, select System > Web Services > REST - Roles.
- On the REST Roles page, click
Add Admin Role - Enter a role name, eg
Belco - Enter your admin password
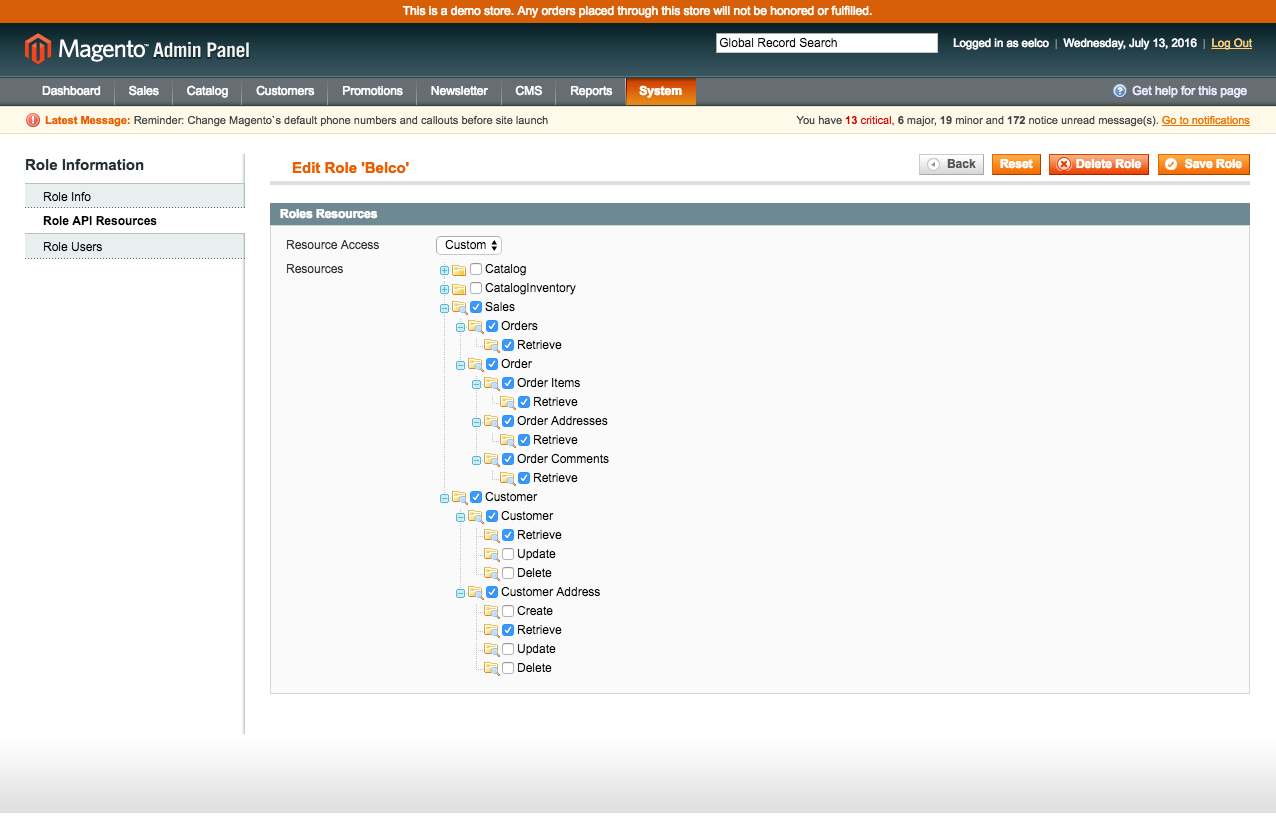
- Configure the
Role API Resources, selectRetrieveforOrders,Order Item,Order addresses,Order Comments,CustomerandCustomer Address

Click Save Role to save the new role.
4. Configure REST attributes
- On the Magento Admin Panel menu, select System > Web Services > REST - Attributes.
- Click Admin
- Set Resource Access to all
Click Save to save the changes.
5 Configure user access
Next step is to assign the newly created role to a user.
Always create a new user without admin access for extra security.
- On the Magento Admin Panel menu, select System > Permissions > Users.
- Create a new user specifically to access the api.
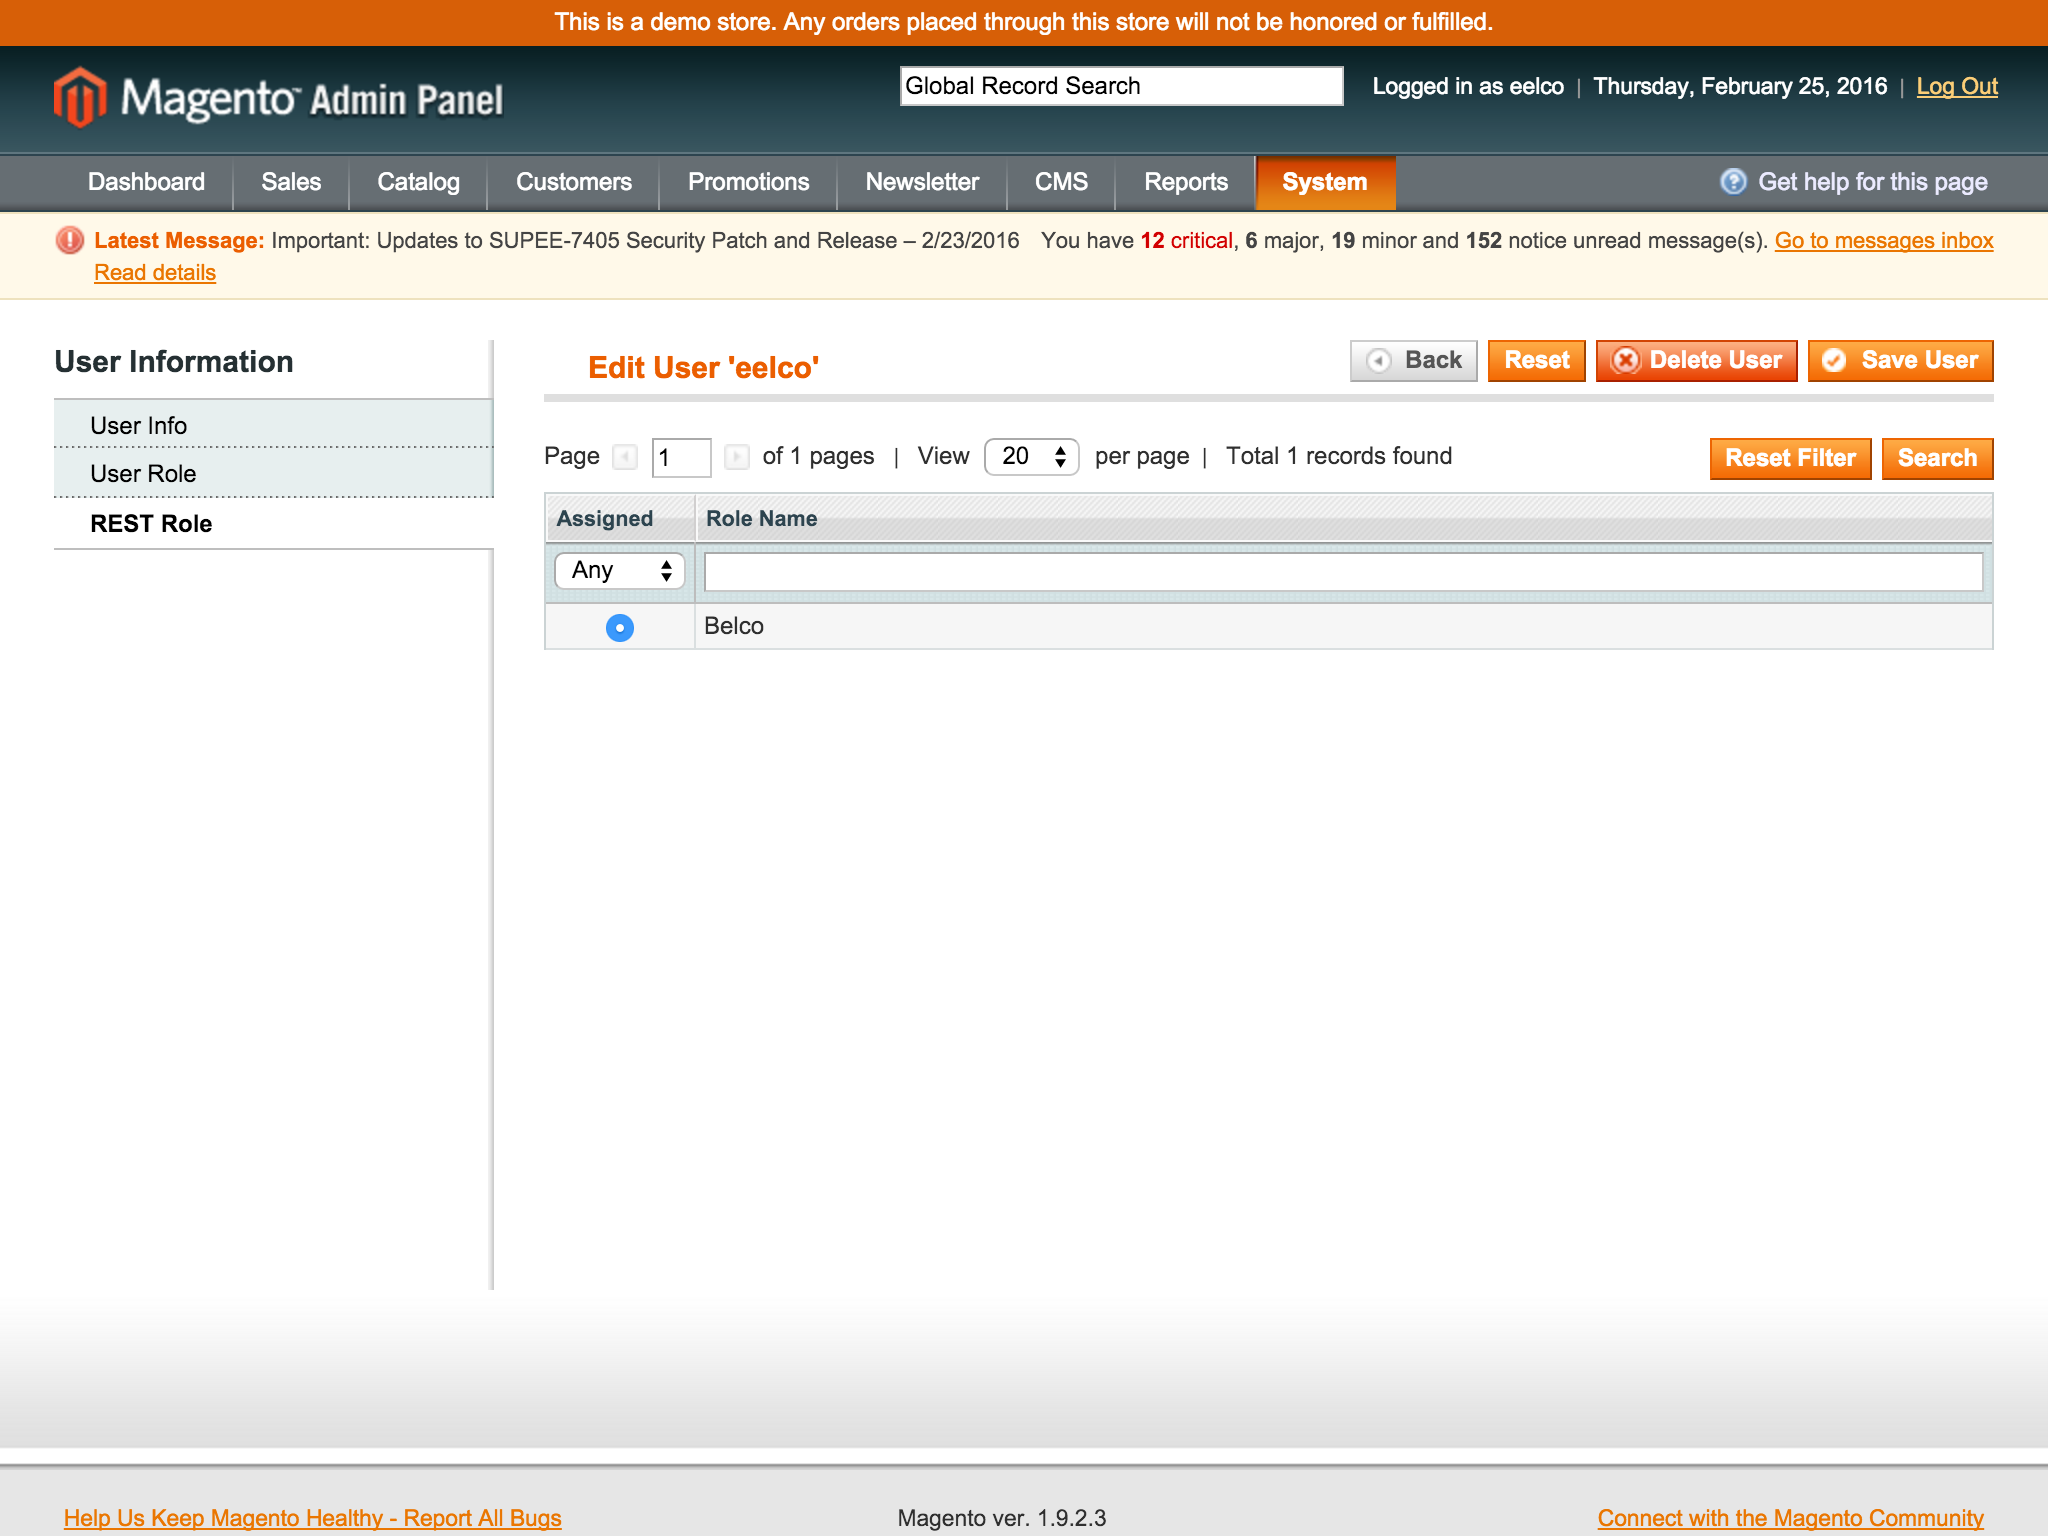
- Open REST Role tab
- Select the Belco role you just created.

Click Save User to assign the new role.
6. Configure the integration
Now that we've created a consumer for Belco, we can enable the integration in the Belco dashboard.
- On the top right settings menu, click on Settings
- On the left navigation, click on the shop you want to connect to Magento and open the Magento integration settings page.

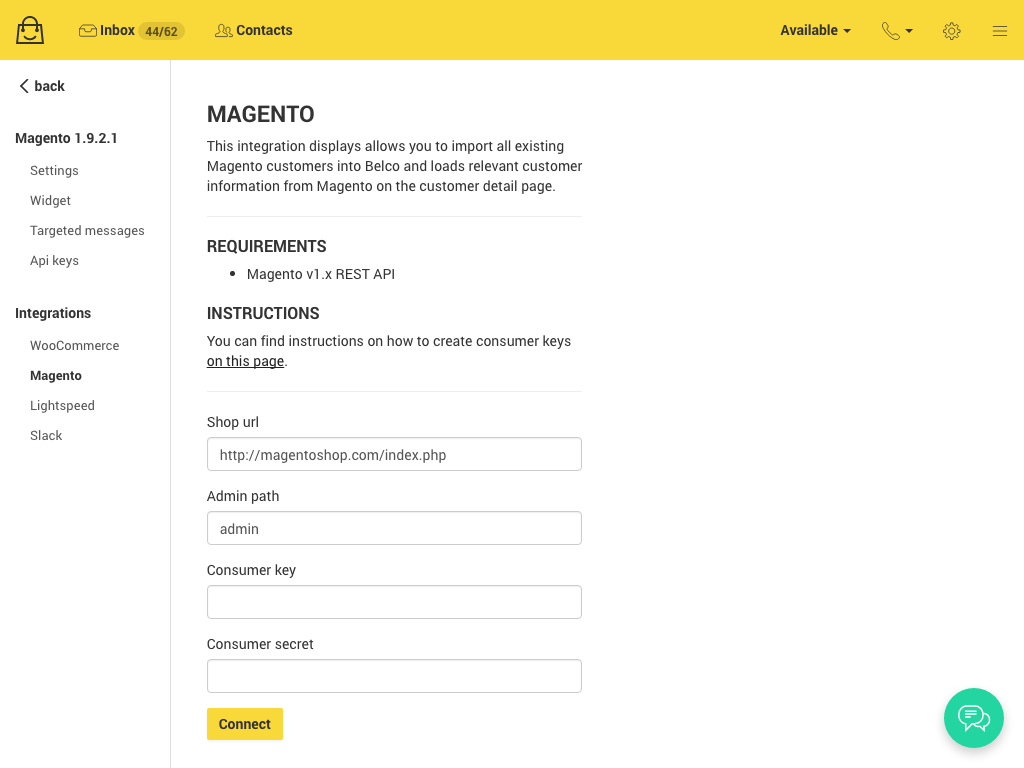
- Enter the root url of your shop, eg https://mystore.com/index.php (be sure to add
/index.phpafter the url) - If you use a custom admin path, replace admin by the path you're using.
- Paste the Key and Secret you just copied in the corresponding fields .
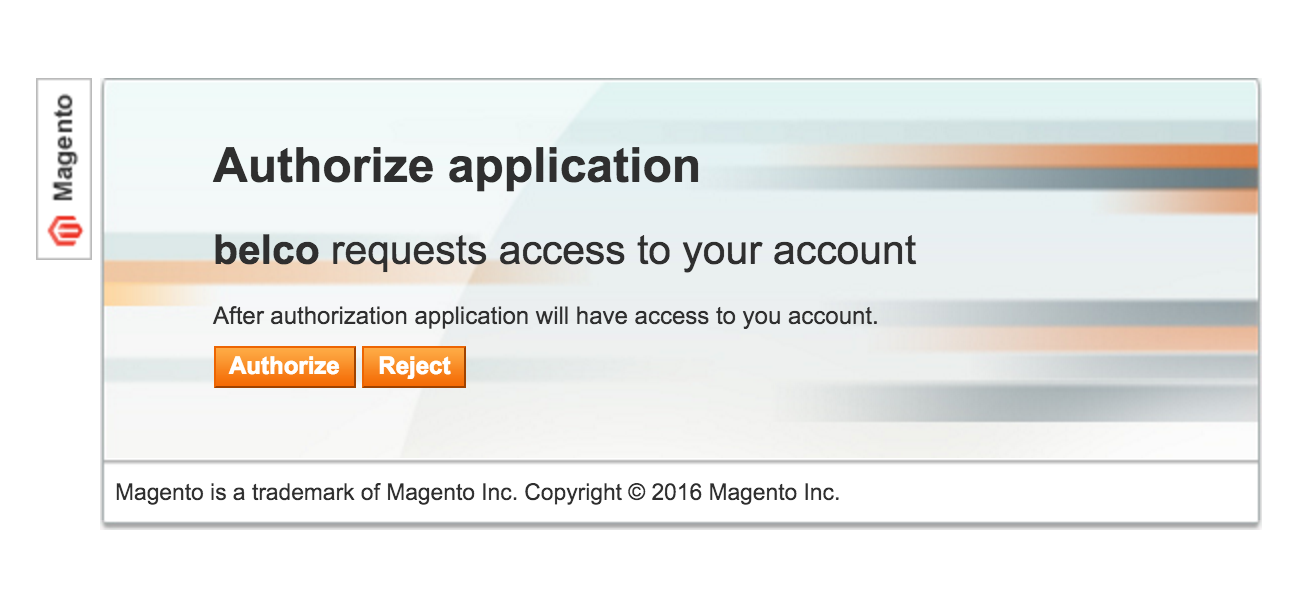
- Click Connect, a popup will be opened, redirecting you to your Magento store.
- In the popup login with the user for which you assigned the Belco REST role
If you're currently logged in as an admin user, log out first and continue from step 4.

Click Authorize to finish the configuration.
7. Importing existing customers
Once you successfully connected Magento you can import your existing customers into Belco.
New customers will be automatically added.

Click Import existing customers to start the import. Importing can take a while, depending on the amount of customers in your database.
Updated 10 months ago
